Use this quick tutorial to easily get set up with Amazon S3. It’s a handy way to store and deliver your files to your customers. Plus new accounts get no fees for the first 12 months!
Creating a new account
To create a new account simply go to this link and sign up:
https://aws.amazon.com and then click on Sign into Console. You will then be asked if you are a new user and just follow the instructions to create your account.
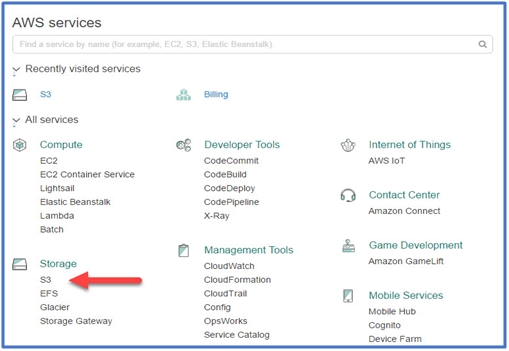
Once you sign into your account you will see this screen, which can definitely look intimidating! Not to worry all you have to do is Click on S3 and this will take you to the correct area of their account. You’ll find S3 under the heading Storage. Don’t worry about the other features.
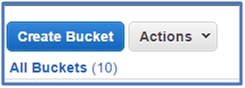
This will take you to the screen where you will do all your Admin tasks from.
Your first step is to create a new bucket
When creating buckets, you may want to assign the name of your website to the main bucket.
I find this helps you organize your files more easily as well. For example, if you want to upload your opt in reports then you will know where you added them and all the documents and files will be in one easy place to find.
No matter of how you name your buckets make them easy to remember.
Always use lower case letters for your buckets.
Folders
After you have created your main bucket you can then create a folder inside that bucket.
These folders can use upper case letters if you wish
For my PLR site I have:
Main Bucket – name of store
Folders: – Freebies, JVZoosales, Amember etc
Then inside each folder you can create a sub folder. For example, with JV Zoo sales I create a new folder for each product. This keeps things nice and tidy and accessible.
Or you can just upload files directly into the bucket.
Uploading Files
Once you have your buckets and folders in place you are ready to upload your files.
Simply click on the upload button and select your file via the Add Files Button. This interface has just recently changed, so this is now what you will see.
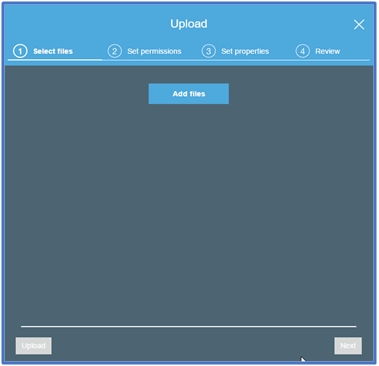
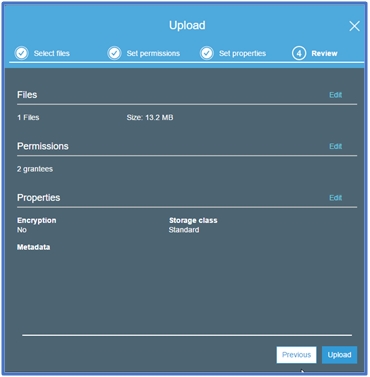
Once you have opened your file, click on the Next button.
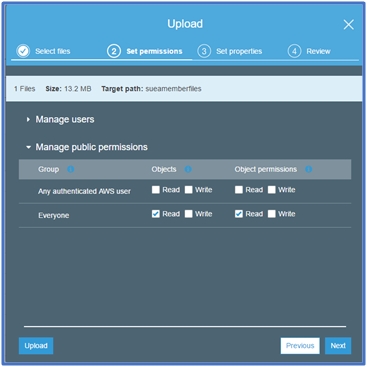
You need to set your permissions next.
Click on the Manage Public Permissions and you will see the above selections. If you want to allow your file to be downloaded by your customers or anyone then simply select Everyone, and give them Read access to both Objects & Permissions.
Click Next
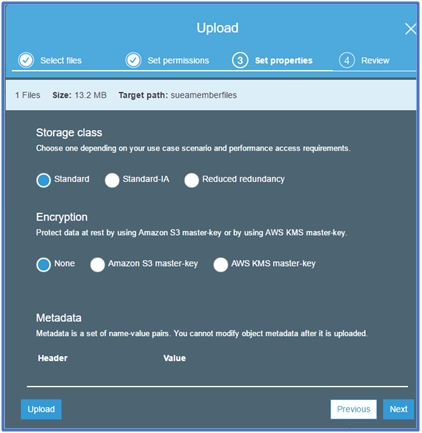
This page is more for advanced users, so make any changes necessary and then click Next. You are now ready to upload your file. Most of the time no changes are required.
The upload speed will vary depending on the size of your file, and your internet connection. At the bottom of your screen you will notice a window where you can check on the progress of your upload.

If your connection times out you will see an error notice:
Files failed to upload
If this happens, just start again. If you have a slower upload speed you will soon discover what time of day you can upload faster and then just add this to your schedule.
To find your download link to use, check the box next to the file name and a box will open up with all the details related to the file.
This is what you will see:
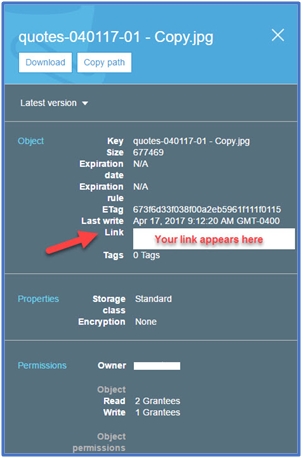
Copy and paste the Link as shown above. Test the link out to make sure the download works. It should start to download, which you can then just cancel. If it doesn’t work and gives you an area then check that you have set your permissions correctly.
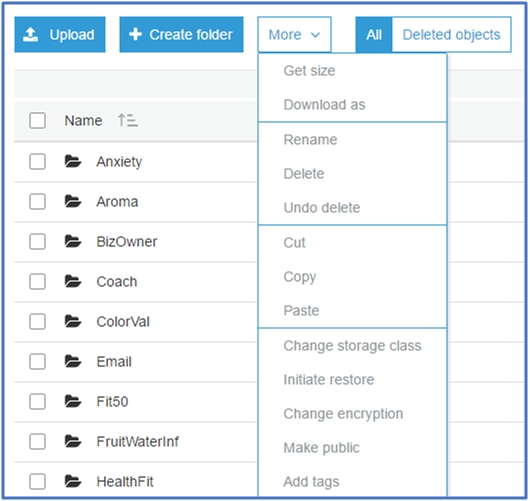
If you need to make any changes just use the More button at the top of your screen, see screenshot below:
Here you can easily rename the file, change the permissions – making it public is the same as setting the permissions to Everyone in the earlier steps.
Moving and Copying Files
Sometimes you may wish to have your files in more than one bucket or folder. It’s very easy to copy and move files between buckets or folders.
Click on the square box next to the file that you want to copy.
Go to the More Tab:
Select Cut or Copy
Then go to the bucket or folder of where you want to copy or move the folder too.
Select More and Paste
If you want to Rename or delete the file you would select this action from the More tab as well.
One thing to note that is if you want to add more content to a file or upload a new version, you will have to delete the old file and upload a brand new version.
That’s the basics of how to use Amazon S3. It isn’t as difficult as you may think and is an easy to store and share your files.
Note: This report is updated as of April 2017 and includes all current changes that Amazon has made to S3 up to that point.